Hey friends! I’m back with a post about my first attempt at watercoloring with distress inks.
Card Front
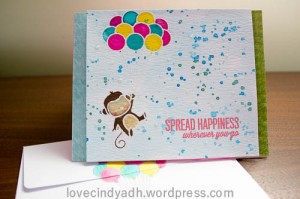
I chose my image from a cute stamp set called Up and Away. I just love these cute critters. I picked the monkey for this card.
First I started with stamping the monkey and the balloons with a Versmark stamp pad and embossed the images with some clear embossing powder on some watercolor paper by Tim Holtz pre-cut to 4.25 inches by 5.5 inches. I also stamped the sentiment with some Versamark ink and embossed it with the pink embossing powder from Ranger to add a pop of color.
Then I moved onto the fun part. I laid out my craft sheet by Ranger and went to work. I smudged the distress inks right onto the craft sheet and picked them up with my paint brush. I added the color to the little wells that my embossing made for my images.
To make some of the of the images pop, I sprayed some water mixed with Perfect Pearls Pigment powder and used that in the coloring of the balloons and the paint splatter after all of the coloring was done.
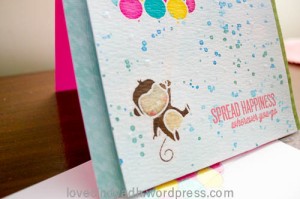
Since the embossing powder resists the watercolor, it was very easy to wipe any color away to give it that glossy shine.
And of course, I couldn’t stop there. There was not enough glitter for me, so I added some Stickles glitter glue to the paint splatter to make it shine just a little more.
Hindsight is 20/20
We learn as we go. That is always true. And I learned a lot from this first watercoloring experience.
The first thing I learned was that I would have stamped or embossed in a different color. The clear would be nice if there were no details like a face. I feel like the face of this monkey isn’t seen as well a it could because of this.
Secondly, I think I would have made some bolder color choices to make this card more playful.
Finally, I would have masked the monkey and the balloons so they did not get any splatter on them. I could have even done a simple mask like with a post-it or scrap piece of paper. (Post-it tape is on my wish list!)
The Envelope
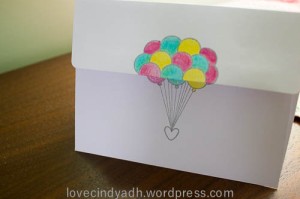
You know me… I love my matching envelopes. So I stamped this envelope back with the balloons from the card front and colored them with two shades of colored pencils to match the colors of the watercolor on the front. I almost always add a heart of the back of my envelopes and todays envelope was no different. I stamped a simple outline of a heart at the base of the balloon strings.
And because I just couldn’t resist, I made sure I covered those balloons with some Wink of Stella to make them shimmer!
I hope you enjoyed taking a peek at the card I made. As always the supplies I used will be listed below with links of where you can purchase them. I hope you’ll come back and see me again soon!


